


OpenViking 是专为 AI 智能体(Agent)打造的上下文数据库,主要适用于多 Agent 协同、长期记忆管理、复杂任务执行等场景。该数据库采用 viking:// 文件系统范式,将智能体的记忆、资源与技能进行统一组织管理,依托分层加载机制按需供给上下文,在减少 Token 消耗的同时提升运行效率,结合目录式检索优化信息召回效果。功能上,OpenViking 支持多租户、多用户及多 Agent 隔离,且能在会话结束后自动沉淀长期记忆,实现智能体能力的持续积累与自我优化,既有效降低开发者的上下文管理成本,也能显著提升 OpenClaw 等智能体的整体运行表现。
方舟 Agent Plan 支持在 OpenViking 中使用,可参考本文进行配置及使用。
一、前提条件#
- 您已按需订阅 Agent Plan 套餐。如未,请访问 开通管理-Agent Plan 页面订阅套餐。
二、安装 OpenViking#
前提条件#
- 已安装 Python 3.10 或更高版本。
- 已安装 Go 1.22 或更高版本。
- 已安装 C++ 编译器,且 GCC 9+ 或 Clang 11+。
安装步骤#
执行以下命令安装 OpenViking。
pip install openviking --upgrade --force-reinstall
安装结束后,执行以下命令查看安装结果,若显示版本号则安装成功。
openviking --version
三、配置 OpenViking#
- 创建配置文件
~/.openviking/ov.conf,配置信息如下。需要修改的配置信息如下:-
storage.workspace:替换为实际的工作空间路径。 -
embedding:配置向量化模型,用于向量化和语义检索。-
embedding.dense.model:支持的 Embedding 模型doubao-embedding-vision。 -
embedding.dense.api_key:替换为您自己的 专属 API Key。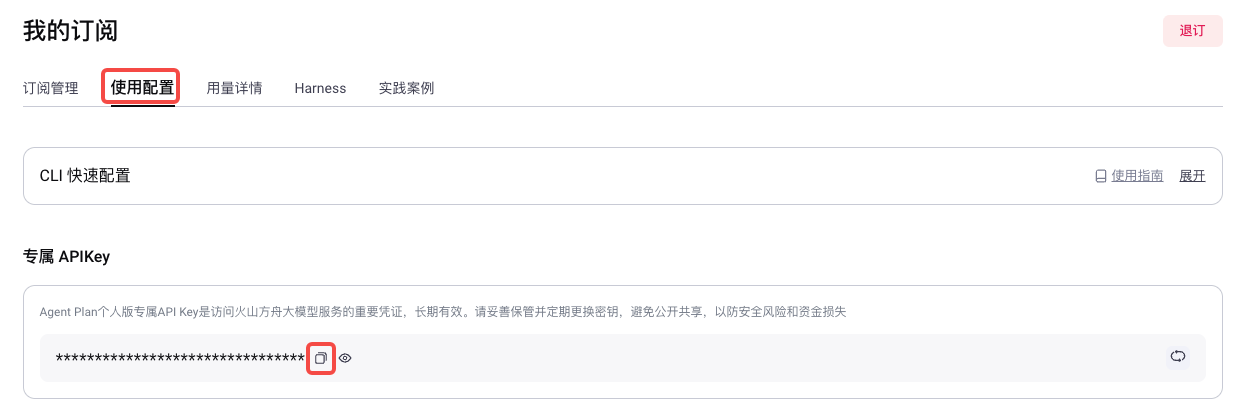
-
-
vlm:配置语言模型,用于图像和内容理解。vlm.model:支持的语言模型,具体参见支持模型及 Harness。vlm.api_key:替换为您自己的 专属 API Key。
-
{
"storage": {
"workspace": "/home/your-name/openviking_workspace"
},
"log": {
"level": "INFO",
"output": "stdout"
},
"embedding": {
"dense": {
"backend": "volcengine",
"api_key": "<ARK_API_KEY>",
"model": "doubao-embedding-vision",
"api_base": "https://ark.cn-beijing.volces.com/api/plan/v3",
"dimension": 1024,
"input": "multimodal"
}
},
"vlm": {
"backend": "volcengine",
"api_key": "<ARK_API_KEY>",
"model": "doubao-seed-2.1-pro",
"api_base": "https://ark.cn-beijing.volces.com/api/plan/v3",
"temperature": 0.1,
"max_retries": 3
}
}
- 设置服务器配置环境变量。
根据系统环境选择对应的方式设置环境变量。
执行以下命令,设置环境变量指向对应的配置文件。
export OPENVIKING_CONFIG_FILE=~/.openviking/ov.conf
选择以下任一方式,设置环境变量指向对应的配置文件。
-
PowerShell
$env:OPENVIKING_CONFIG_FILE = "$HOME/.openviking/ov.conf" -
CMD
set "OPENVIKING_CONFIG_FILE=%USERPROFILE%\.openviking\ov.conf"
四、开始使用 OpenViking#
-
创建 Python 文件
example.py,代码内容如下。from openviking_sdk import SyncHTTPClient # Initialize OpenViking HTTP client client = SyncHTTPClient(url="http://localhost:1933", api_key="<ARK_API_KEY>") try: # Initialize the client client.initialize() # Add resource (supports URL, file, or directory) add_result = client.add_resource( path="https://raw.githubusercontent.com/volcengine/OpenViking/refs/heads/main/README.md" ) root_uri = add_result['root_uri'] # Explore the resource tree structure ls_result = client.ls(root_uri) print(f"Directory structure:\n{ls_result}\n") # Use glob to find markdown files glob_result = client.glob(pattern="**/*.md", uri=root_uri) if glob_result['matches']: content = client.read(glob_result['matches'][0]) print(f"Content preview: {content[:200]}...\n") # Wait for semantic processing to complete print("Wait for semantic processing...") client.wait_processed(timeout=120) # Get abstract and overview of the resource abstract = client.abstract(root_uri) overview = client.overview(root_uri) print(f"Abstract:\n{abstract}\n\nOverview:\n{overview}\n") # Perform semantic search results = client.find("what is openviking", target_uri=root_uri) print("Search results:") for r in results.get("resources", []): print(f" {r['uri']} (score: {r['score']:.4f})") # Close the client client.close() except Exception as e: print(f"Error: {e}") -
执行命令
python example.py,输出如下内容则说明 OpenViking 已成功运行。Directory structure: ... Content preview: ... Wait for semantic processing... Abstract: ... Overview: ... Search results: viking://resources/... (score: 0.8523) ...
其他操作#
CLI 服务端配置并使用 OpenViking#
如果需要将 OpenViking 作为独立的 HTTP 服务运行,然后从任意客户端连接,请参考以下步骤进行配置。
前提条件#
已安装并完成配置 OpenViking,具体参见 安装 OpenViking、配置 OpenViking。
启动服务#
执行以下命令启动服务。
openviking-server
启动完成后,在新的命令行界面执行以下命令验证服务启动是否成功,若返回"status":"ok"则表示启动成功。
curl http://localhost:1933/health
使用 CLI 连接#
-
创建 CLI 连接配置文件
~/.openviking/ovcli.conf,配置信息如下。其中<ARK_API_KEY>需替换为您自己的 API Key。{ "url": "http://localhost:1933", "api_key": "<ARK_API_KEY>", "output": "table" } -
在新的命令行界面执行以下 CLI 命令。
# Check system health openviking observer system # Add a resource to memory openviking add-resource https://raw.githubusercontent.com/volcengine/OpenViking/refs/heads/main/README.md # List all synchronized resources openviking ls viking://resources # Query openviking find "what is openviking"
使用 curl 连接#
启动服务后,也可以在命令行界面使用 curl 命令连接 OpenViking。
# Add a resource
curl -X POST http://localhost:1933/api/v1/resources \
-H "Content-Type: application/json" \
-d '{"path": "https://raw.githubusercontent.com/volcengine/OpenViking/refs/heads/main/README.md"}'
# List resources
curl "http://localhost:1933/api/v1/fs/ls?uri=viking://resources/"
# Semantic search
curl -X POST http://localhost:1933/api/v1/search/find \
-H "Content-Type: application/json" \
-d '{"query": "what is openviking"}'
在 OpenClaw 配置 OpenViking 记忆功能#
通过 OpenViking 为 OpenClaw 提供长效记忆能力,配置完成后,OpenClaw 将自动记住对话中的重要信息,并在回复前回忆相关内容。
前提条件#
已完成 OpenClaw 的安装与配置,具体参见 安装 OpenClaw、配置 OpenClaw。
安装及配置#
具体步骤参见 为 OpenClaw 安装 OpenViking 记忆功能。
安装完成后,编辑配置文件~/.openviking/ov.conf,使用 Agent Plan 支持的模型。配置信息可参见 配置 OpenViking。